Creating a successful food plot takes some planning and elbow grease, but with the right tips, you’ll have a plot that thrives. Here are the top five best practices, shared by Brad Harper of Harper Growing Solutions, to help you get started.
1. Placement and Soil Sampling
Placement:
When deciding where to place your food plot, consider the surrounding environment carefully. The location of your plot is crucial; it shouldn’t just be about convenience. Think strategically about proximity to bedding areas, destination food sources, and whether the plot will serve as a kill crop. If you have the option, choose a location that maximizes its effectiveness for your hunting strategy.![]()
![]()
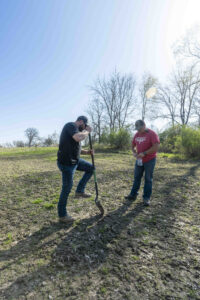
Soil Sampling: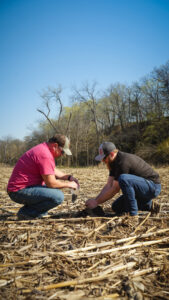
Before you plant anything, you need to take a soil sample. This sample will tell you how much lime and fertilizer you need, guide you in choosing the right seeds, and ensure you don’t waste resources. With a proper soil sample, you can determine the exact amounts of lime and fertilizer required, track the progress of your soil’s health over the years, and potentially reduce the amount of fertilizer needed in the future.
2. Seed Choice
Once you have the soil sample results, choosing the appropriate seeds becomes much more manageable. Your seed choice should align with your hunting schedule and the specific conditions of your plot. For instance, if you’re hunting during bow season, you might opt for different seeds than if you’re hunting later in the season. Additionally, the soil type—whether sandy or fertile—will influence your seed selection. A diverse mix can help build soil health, while specific crops can be chosen to meet your hunting needs.
3. Lime and Fertilizer Application
With soil sample results and seed choices in hand, the next step is applying lime and fertilizer. The amount and type of these inputs will vary depending on the crops you plan to grow. Accurate application of lime helps adjust the soil pH to the desired level, while the right amount of fertilizer ensures your plants receive the necessary nutrients. For those using granular applications, annual soil sampling is recommended to keep track of nutrient levels. Alternatively, liquid applications focus more on feeding the plants and soil biology, reducing the frequency of soil sampling.
 4. Plot Preparation
Preparation of your plot is critical for ensuring successful germination and growth. This step involves deciding whether to use tilling or no-till methods or whether to spray to terminate existing vegetation. Ensuring a clean bed, free from weeds and preparing the soil correctly—whether through tilling, discing, or no-till methods—is vital. The depth at which you plant your seeds also plays a large role, and soil preparation should align with the specific needs of your chosen seeds.
5. Planting
Proper planting techniques are important for achieving good seed-to-soil contact, which is necessary for optimal germination. Depending on the seed type, you’ll need to plant at the correct depth. Tools like cultipackers or drags can help press the seed into the soil or cover it appropriately. Additionally, consider applying lime and fertilizer during the planting process, and plan for any necessary post-planting applications of fertilizer or nitrogen based on your crop and soil sample results.
By following these best practices, you can create thriving food plots that meet your specific needs and ensure successful growth and hunting experiences. Proper planning and execution at each step—from placement and soil sampling to planting—will significantly impact the success of your food plots.